Tuesday, November 30, 2010

Autumn Leaves

Happy last day of Autumn! This project (like many of my projects lately) was inspired by this blog.


I made these Autumn leaves from wool felt I had on hand for various projects. I was surprised and pleased I had so many Fall colors! The embroidery floss also came from my stash (thanks to helping my mom cleaning out her sewing room when she moved a handful of years back!).


As you can see I wasn't quite finished with the embroidery when I took the pictures, but I was quickly running out of daylight, so I took the picture anyway. What I mean to say is, I purposefully didn't finish the project so that you could see what the embroidery floss looks like on my needle!


I hot-glued a brooch pin or hair clip to the back so I could wear them. Like so:


And so:


Do they look cute with my growing baby bump?


I hope you had a wonderful September, October, and November (and First of Octember)! Tomorrow Winter and the Christmas Season may officially begin! (According to my own personal almanac, and despite the eight inches of snow I shoveled from my walk today.)

Thursday, November 25, 2010

Happy Thanksgiving!

There's so much I'm thankful for. I'm especially grateful for my husband, two boys, and a little baby girl I have yet to get to know. Have a delicious, meaningful, safe and fun Thanksgiving!


This is a set of autumn-themed paper mache boxes I made a few years back to sit on my desk at the office (back when I was a full-time employee). I kept Tootsie Rolls in them. Now I can't do that or my kids will eat them all at once! but I still set the boxes out every year with my Fall decorations.

Wednesday, November 24, 2010

Twilight Goodies


For anyone looking for some Twilight stocking stuffers, I just updated my Etsy shop with the handmade vinyl key chains and rectangular coin/credit card purses I made for the Eclipse premier.

Saturday, November 20, 2010

Embellished Tees: A Blast From the (Not-Too-Distant) Past

Since I blogged the Little Green Men shirts recently I thought I'd share some of the other t-shirt projects I've made before. Some of these are in my Flickr photo stream (but aren't showing up because I need to upgrade since I reached my 200 free photo limit). Many of these are done with felt because I love the way it looks. I free-hand painted the Ninja Turtle, but I really want to get into freezer paper stenciling. As soon as I can remember to buy some freezer paper, that is!

You might recognize one or two of these:

Thursday, November 18, 2010

Little Green Men Tees


At the time of the Toy Story 3 movie release I saw that both Target and Disneyland had some really cute Little Green Men t-shirts. The Target tees were almost affordable, but I don't like the way they fit. So I did what I do and I bought some plain shirts to make my own. I've had this project ready for several months now, but I hadn't decided if I was going to use my favorite t-shirt embellishment technique using felt, or if I would branch out and try freezer stencils. Then a couple weeks ago I saw these and decided it was time to go ahead with the project using knit scraps.


These are fun shirts to wear to Disneyland, especially if you're going to meet some of these guys:


And do some of this:


And this:


And, inevitably, some of this (waiting in line):


To make the appliqué I printed out a picture of the green aliens, cut out the head, and used it as a pattern for my fabric (in this case, a green shirt of mine that had a stain, plus some other random knit scraps). I pinned it altogether before I sewed. Then I touched it up with some embroidery. Pretty simple.

I actually did the project when I was in California last month. Two (of my four) sisters and I had a little sewing-pregnant party. Yes, we're all three pregnant! Ashley made baby booties and a Pinocchio costume hat for her son's Halloween costume and Sadie (taking the picture) made curtains and baby booties. Then we stretched out with some pre-natal yoga. That was a fun day. I love crafting together!

Monday, October 11, 2010

Pilot Caps, Goggles & Jackets

*UPDATE*
I have now posted the pattern. Scroll down to the end of this post!


Have a young pilot-in-training in your house? I have two! For homeschool this year my sisters and I wrote a theme called "Soaring Over America." Naturally we needed pilot caps and bomber jackets for the kids to wear.


As you can see, these little aviators are equipped and ready for take off!


These inexpensive flight jackets are made from Walmart hoodies. I wanted them to have a collar instead of a hood, so I modified them a little. I like how the soft, wool-looking lining shows a little more with the collar turned down.


The pilot caps are made from thin vinyl, though they could easily be made from felt as well (I'm thinking kids' party favors for an "Up" themed birthday...)


I lined the caps for extra comfort and so I could use some cute fabric lining. Don't you love the stars?


I made the goggles out of felt with an elastic backing.


I was thinking these also make great superhero masks by themselves, but in the end I stitched the goggles to the caps so they wouldn't get lost. It also helps my two-year-old put them on easier.


(back)

Intrigued? Let me give you a hint. I made the goggles in two layers of felt to help them keep their shape better. I cut out one layer with the felt folded in half so they would be symmetrical, then sewed it onto a rectangle of felt for the second later. Not until I was finished with the sewing (well, minus the openings I left for the elastic) did I cut out the second layer. I've done this with some other projects, too. It's helps out a lot.


By the way, if you're interested in a pattern for the the caps I can post it for you. It took me some tweaking to get it the way I wanted it. I don't mind sharing. Especially with Halloween coming! *UPDATE! Pattern posted below*

I made simple initial patches for one sleeve and sewed wings patches onto the other sleeve. The idea is that the kids will earn more patches throughout the year. I even have a genuine air force wings pin for them to earn. I'm excited for that one.


Don't these look fun all ready and waiting for the boys to find them in the morning? The different colored felt and lining helps the boys easily tell which cap belongs to which kid. No fighting over them!


You can bet these will be doubling as Halloween costumes! I even made an extra cap for myself. Hmmmm... Amelia Earhart or Anne Marrow Lindbergh?


PILOT CAP PATTERN
The pictures below are set up so you can easily print each on 8 1/2 x 11" paper. Cut out each picture, overlap them, then tape them together for the pattern. My kids have small heads (as do I), so you'll want to add some seam allowance. I suggest first sewing up a test cap in scrap fabric and adjusting it until you have the right fit. Use felt for a simple, quick cap, or use vinyl and a cotton lining for a fancier one. Feel free to comment or email me with questions. Maybe in the future I'll make it into a full tutorial.


Wednesday, October 6, 2010

Sweater Vest Makeover and Tutorial


Did Brittany take up knitting? No, it's a refashion!


The boys had fun jumping and posing for the pictures. Here's what my oldest son Alexander has to say about it: "Cool, cool vests! Lincoln is watching me jump, and I'm jumping, and I like it. Lincoln is jumping cool, too."


I've had some sweater vests of mine collecting dust in my closet for quite some time. Earlier this year during Celebrate the Boy I saw that Dana made a boy's vest from a man's sweater:


Cute, isn't it? It got me thinking. So a few days ago I made my two matching sweater vests that I never wear into something my boys can wear:


That's me at Lake Tahoe a long time ago.

Since I was just changing the size of the vests instead of converting a sweater into a vest I couldn't follow the MADE tutorial exactly. Dana kept the hem of her sweater intact, whereas for me it seemed better to keep the V-neck collar, especially since I was planning on reusing all the rib-knit edges. So I started by lining up the collar of the project with one I have in the right size. (Notice the wrinkled vest? It's been folded up much too long!)


Next I started hacking away at that thing until it was the right size:


I was careful to save the rib knit sections to refinish my new little vest:


While I did keep the front V-neck intact, I had to reposition the back neck collar. I started with this, cutting off the extra rib knit. (Also, I noticed there was a stain on the outside of the back collar so I cheated and flipped it around. You can't even tell it's backwards!) One thing that helped to keep the fabric from stretching out of shape while I sewed was to stay-stitch the vest piece first. I did this around the collar, armholes, hem...and I probably should have done it on the side seams, too.


I finished off the raw edges with a zig-zag stitch (you could serge, or use whichever finishing stitch you prefer). To help the seam lie flat I topstitched the seam allowance away from the collar:


Next came the shoulder seams. Again, I topstitched the seam allowance, this time towards the back of the vest:


After the shoulder seams were complete I sewed up the side seams. I finished the edges, but didn't topstitch them down. My hem and armhole rib knit loops were too big for this little vest, so I measured and cut each of them, then sewed them back into loops:


Next I sewed the rib knit armhole loops into the armholes, again finishing the raw edges and topstitching the seam allowances towards the garment. Then I did the same for the hem:


Ta-da! Ready for my little man.


The navy blue vest also needed resizing. I love making my boys match.

Wednesday, September 29, 2010

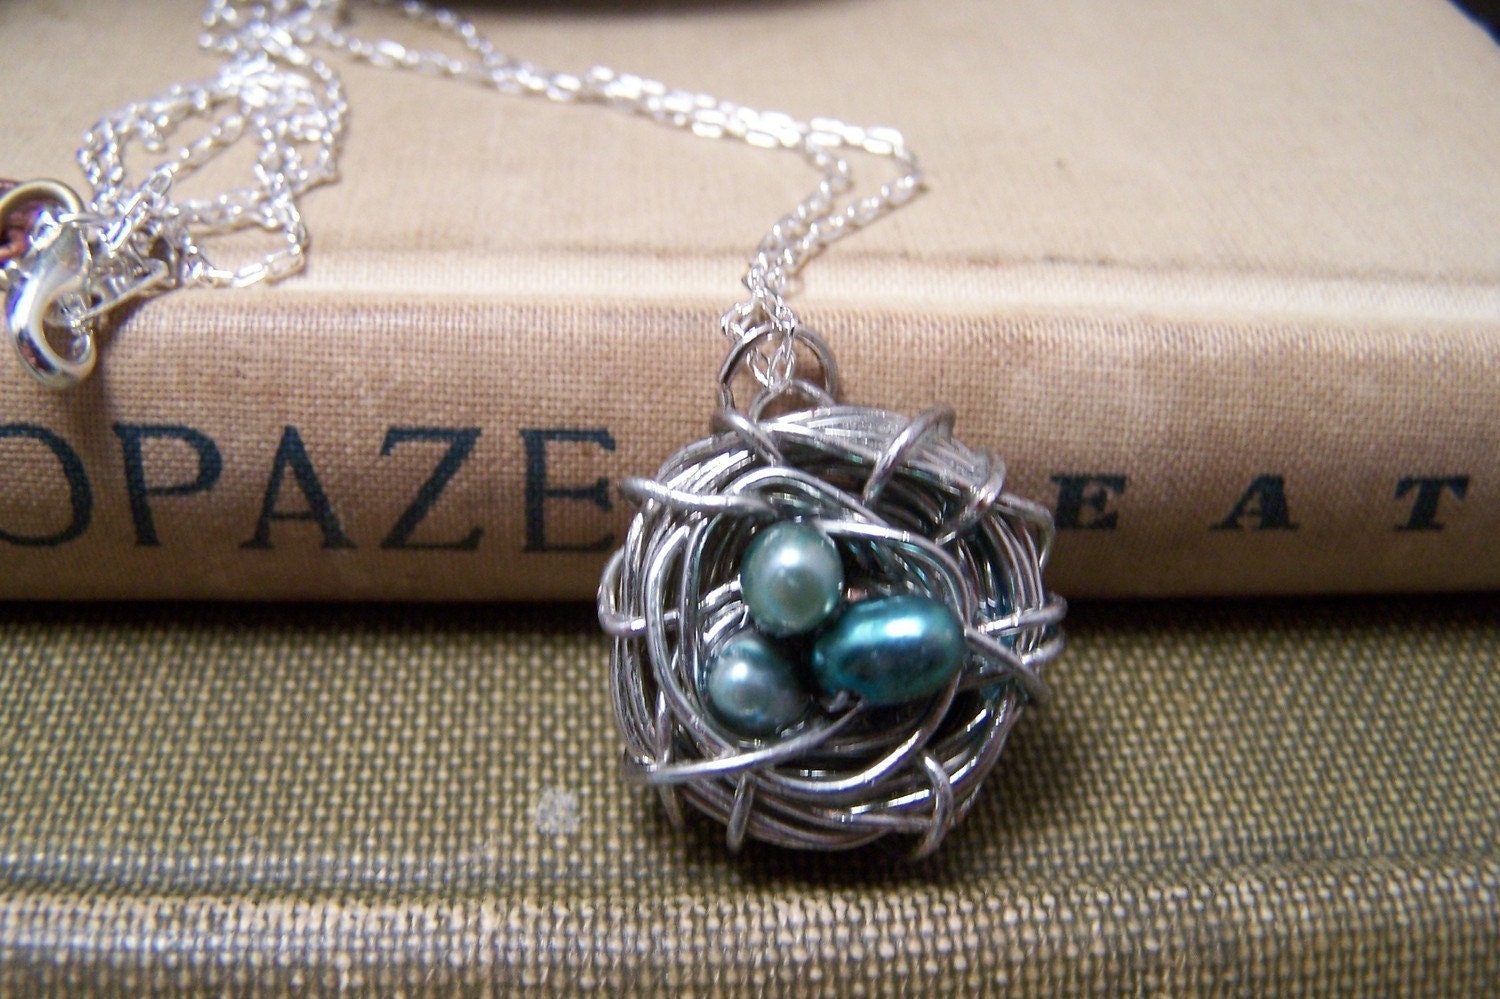
Third Egg in the Nest


Silver bird nest pendant from Emilina Ballerina's shop on Etsy

Yes, I'm expecting! Not only that, but after birthing two boys I'm finally having a girl! I couldn't be happier about the news. My crafting has been a little (okay, a lot) sluggish the past several months. I'm going to use pregnancy as my excuse, though I can think of a few more to top it off. But now that I'm out of that awful nausea stage—though I'm still in the always tired stage—and I recently learned that Mr. Stork is bringing me a girl, I'm hoping that she will be my muse.

I think my most common comment on craft blogs is that I wish I had a girl so I could make/buy/win that skirt, dress, hairclip, or other flowered or ruffled item, too. Now I'm eligible! And oh-so-excited! I hardly know where to begin. So what are your favorite baby girl items? Where should I start?

And, because I know you'll ask, she is due February 19.

P.S. I did buy that necklace. I feel like I've earned it! And isn't it beautiful?

Thursday, September 16, 2010

Tie on that Patriotism

This is one of those projects inspired by the fabric itself. It's from Riley Blake's All Star line. When I saw the paisley I knew exactly what to do with it: Ties!


These were taken on July 4 in my mom's backyard. The flag made for some really fun pictures, although it was stressful trying not to let the boys drag it on the ground!


I love the chest puffs...


The sweetness...


...And the enthusiasm. But enough about my cute boys. Let's talk about the ties.


I had originally planned to make them like a classic tie so I wouldn't have to mess with the clip and all that. But when I cut them out, measuring from a Children's Place tie, I forgot to account for the part that goes around the neck, though at least I remembered the knot!


My local quilting shop sells clip-on tie patterns and the clips, so I made an emergency run over there to buy the clips so I could finish the ties in time for Independence Day. I didn't know how to do the knot (and still don't!), but I just played with it until I got it right, then put in a few stitches to keep it in place.


I made three of these ties. On this one I top stitched the red "lining" in place. In the other ones I sewed then turned. It's nice to try different ways.


Since I cut the ties out on the bias of a yard of fabric I had plenty of leftover material. Here's the first tie, along with matching skirts that went to my nephew and nieces for their birthdays. I had never made little girl skirts before so I had a blast with these.


Here are the girls wearing them on July 4 (taken with a cell phone in Milwaukee--so far away!).


Little Patriots

I suppose I should have posted this for Independence Day, Labor Day, or even September 11. We're closest to that last one, so let's just say this it's 5 days earlier :)
Related Posts Plugin for WordPress, Blogger...