Showing posts with label Boys' Clothing. Show all posts

Tuesday, November 6, 2012

Scarlet Pimpernel Costume

My almost-8-year-old chose to be the Scarlet Pimpernel for Halloween. Sir Percy Blakeney is known for his impeccable fashion taste. I don't think he would have worn rolled-up jeans, but that's okay.


Step One: The Coat - My son tried on several women's coats at the thrift store. This is the one he chose because it's supposed to be "really fancy." He didn't like the solid navy wool coat that I chose because it wasn't fancy enough. I relented because I'm trying to let him make more choices (even though I wouldn't have needed to modify the navy one to fit him!). He knew what he wanted and it was perfect. Or soon would be. Once home, I put the coat on him inside-out and pinned along the underarm seam and down the sides of the coat. He helped with the sewing. After sewing I trimmed the seam allowances with pinking shears. I also turned up the sleeve cuffs. Simple and easy. I even sewed and trimmed right over the pockets! The coat is nice and long on him. He seemed upset when I seam-ripped the shoulder pads out, but I didn't feel like giving in on that point.


Next comes the lace: The jabot (jah-boh), cravat (not pictured, but what is just a rectangular strip of white fabric tied around the neck), and the cuffs (which have elastic on them). I never thought I'd ever buy lace for my son's Halloween costume!


The jabot is made of strips of gathered lace sewn to a trapezoid of cotton (actually, two), then sewn to a ribbon with a velcro closure. This particular ribbon and velcro originally came around the Christmas pajama pants I got the kids from Target last year. Yes, I saved it. Yes, I used it. I think I deserve a pat on the back for that. I just realized that I forgot to make lace and/or buckles for his shoes. Ah well, Halloween is always rushed. I don't think I would have had time, anyway!


I didn't know if anyone would recognize "what" his costume was supposed to be, so I asked Alexander if he wanted me to make him a name tag. He said yes, as long as the writing was fancy enough. Apparently my penmanship met his approval. I used some parchment paper scraps I just happened to have around.


The oversized scarlet pimpernel flower was a cheap-o poinsettia from the dollar store. It used to have seven petals but I cut off two to make it star-shaped and hot-glued the empty spaces together as I was gluing the flower to the name tag. Yes, I also have a stash of brooch pin backs.


The green vest was from an old white rabbit costume that my sister wore in a ballet recital many years ago. I'm glad it didn't clash with the coat. Black trouser socks and dress shoes finished off the bottom half of the costume. The sword helps balance out the masculinity of the costume. Sink me! If only I had time to find a magnifying glass for a chain around his neck.


They seek him here, they seek him there...

Tuesday, August 30, 2011

Cowboy Cac-tie

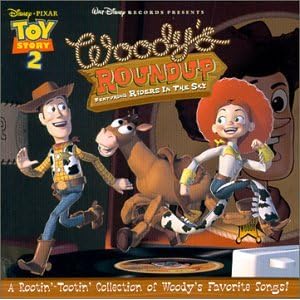
Cactus ties to wear to the concert of our favorite singing cowboys, The Riders in the Sky.


Too Slim, the bassist, is the inspiration for the cac-tie.


You might think you don't know this cowboy band, but I think you'd recognize some of their music:


Here are the boys waiting for the concert to begin, wearing their Too Slim cac-ties. Yes, that is a snail in Lincoln's hand. Boys will be boys!


Here we are after the concert:


The Riders signed the backs of the boys' ties. What a fun keepsake! (BTW, does Alexander's shirt look familiar?)


The ties were simple to make and hardly took any time at all. I could have made them more complicated, but why? I used a single layer of felt for most of it and stitched around the edges to keep it in shape. I used a tie we already had for getting the basic tie shape, and just free-handed the cactus "arms."


I did put an extra layer of felt on the backs of the cactus "arms" so they would reach skyward. Don't forget to add a couple blooms!


I'm a bit embarrassed to say that I had never actually tied a tie before. A YouTube tutorial remedied my inexperience. It wasn't hard at all! Why do we use clip-on ties, anyway? They're so tricky to make, and the clips can be pricey. I love the authenticity of a real tie. I plan to make some real real ties too (i.e. not clip-on and not cactus-shaped).


You can purchase an authentic Riders in the Sky Cac-tie on their website, here:
http://ridersinthesky.com/index.htm?inc=80&prod_id=3692&sid=17419

Wednesday, October 6, 2010

Sweater Vest Makeover and Tutorial


Did Brittany take up knitting? No, it's a refashion!


The boys had fun jumping and posing for the pictures. Here's what my oldest son Alexander has to say about it: "Cool, cool vests! Lincoln is watching me jump, and I'm jumping, and I like it. Lincoln is jumping cool, too."


I've had some sweater vests of mine collecting dust in my closet for quite some time. Earlier this year during Celebrate the Boy I saw that Dana made a boy's vest from a man's sweater:


Cute, isn't it? It got me thinking. So a few days ago I made my two matching sweater vests that I never wear into something my boys can wear:


That's me at Lake Tahoe a long time ago.

Since I was just changing the size of the vests instead of converting a sweater into a vest I couldn't follow the MADE tutorial exactly. Dana kept the hem of her sweater intact, whereas for me it seemed better to keep the V-neck collar, especially since I was planning on reusing all the rib-knit edges. So I started by lining up the collar of the project with one I have in the right size. (Notice the wrinkled vest? It's been folded up much too long!)


Next I started hacking away at that thing until it was the right size:


I was careful to save the rib knit sections to refinish my new little vest:


While I did keep the front V-neck intact, I had to reposition the back neck collar. I started with this, cutting off the extra rib knit. (Also, I noticed there was a stain on the outside of the back collar so I cheated and flipped it around. You can't even tell it's backwards!) One thing that helped to keep the fabric from stretching out of shape while I sewed was to stay-stitch the vest piece first. I did this around the collar, armholes, hem...and I probably should have done it on the side seams, too.


I finished off the raw edges with a zig-zag stitch (you could serge, or use whichever finishing stitch you prefer). To help the seam lie flat I topstitched the seam allowance away from the collar:


Next came the shoulder seams. Again, I topstitched the seam allowance, this time towards the back of the vest:


After the shoulder seams were complete I sewed up the side seams. I finished the edges, but didn't topstitch them down. My hem and armhole rib knit loops were too big for this little vest, so I measured and cut each of them, then sewed them back into loops:


Next I sewed the rib knit armhole loops into the armholes, again finishing the raw edges and topstitching the seam allowances towards the garment. Then I did the same for the hem:


Ta-da! Ready for my little man.


The navy blue vest also needed resizing. I love making my boys match.

Thursday, September 16, 2010

Tie on that Patriotism

This is one of those projects inspired by the fabric itself. It's from Riley Blake's All Star line. When I saw the paisley I knew exactly what to do with it: Ties!


These were taken on July 4 in my mom's backyard. The flag made for some really fun pictures, although it was stressful trying not to let the boys drag it on the ground!


I love the chest puffs...


The sweetness...


...And the enthusiasm. But enough about my cute boys. Let's talk about the ties.


I had originally planned to make them like a classic tie so I wouldn't have to mess with the clip and all that. But when I cut them out, measuring from a Children's Place tie, I forgot to account for the part that goes around the neck, though at least I remembered the knot!


My local quilting shop sells clip-on tie patterns and the clips, so I made an emergency run over there to buy the clips so I could finish the ties in time for Independence Day. I didn't know how to do the knot (and still don't!), but I just played with it until I got it right, then put in a few stitches to keep it in place.


I made three of these ties. On this one I top stitched the red "lining" in place. In the other ones I sewed then turned. It's nice to try different ways.


Since I cut the ties out on the bias of a yard of fabric I had plenty of leftover material. Here's the first tie, along with matching skirts that went to my nephew and nieces for their birthdays. I had never made little girl skirts before so I had a blast with these.


Here are the girls wearing them on July 4 (taken with a cell phone in Milwaukee--so far away!).


Little Patriots

I suppose I should have posted this for Independence Day, Labor Day, or even September 11. We're closest to that last one, so let's just say this it's 5 days earlier :)

Friday, February 5, 2010

Celebrate The Boy Collar Tutorial


Hello! I'd like to shout a special welcome out to those of you who are clicking over from MADE to Celebrate the Boy. I'm so honored that Dana asked me to be a guest blogger.

As you can tell, I love my boys and I love them wearing these button-up shirts. Likewise, I'm excited to share this tutorial with you today.

Click here to enter the Boy's Collar Tutorial

Thursday, February 5, 2009

Boy's Button-Up Shirt Collar Tutorial


This tutorial is for the collar of a button-up shirt. More specifically, the collar of this brown shirt here. First off, let me explain why this is not a detailed tutorial of the entire shirt. It would be way too long! But, I do briefly show you all the steps. If you have questions about any other part of the shirt I would be happy to answer them. I chose the collar because it seems to be the trickiest for me. If you can make the collar (and believe me, you can) then you can make the whole shirt. Since I like seeing everything laid out for me I'll just give you an overview before we jump into the collar.


Outline of This Tutorial
  • Fabric
  • How to Get the Whole Shirt Started
  • Pattern and Cutting
  • Assembling the Basic Shirt
  • Sewing the Collar
    • Upper Collar
    • Collar Stand
    • Attaching the Collar to the Collar Stand
    • Topstitching
    • Buttonhole
    • Button
  • Finishing

  • Fabric

  • For this shirt I used 100% cotton quilting fabric from my favorite local quilting store. This can get a little pricey, I know, so I don't do it very often. A more economical alternative is to use a less expensive fabric for the main part of the shirt and purchase only a fat quarter of the nicer fabric for accents like the collar, sleeve hems and pockets. When I planned this tutorial I intended on making the bulk of the shirt from some solid forest green fabric I found at the thrift store. Unfortunately it didn't match the Frolic animal fabric at all. I wasn't able to make another trip to the store so I used the Brown Cheery Circles I had on hand (originally intended to cover my son's car seat).


  • How to get the Whole Shirt Started


  • Steps for Making Entire Shirt
    1. Pattern
    2. Cutting
    3. Shirt Back to outer Yoke
    4. Shoulder seams
    5. Side seams
    6. Sleeves
    7. Placket (where the buttons will go)
    8. Inner Yoke
    9. Collar
    10. Buttons and buttonholes
    11. Hem

    There's a reason I do it in that order, but the list is not set in stone. You might be anxious to just get to the collar so I'll give you a slacker's list of the minimum steps required to make the collar.

    Slacker's Steps to Get to Collar Fast
    1. Pattern: shirt Front (with extra room in front for folding over a placket, or a strip for separate Front Facing), Yoke, Collar, Collar Stand
    2. Cutting: same, but also a strip of interfacing for Placket/Front Facing, Collar and Collar stand
    3. Shoulder seams
    4. Inner Yoke (at the shoulder seams)
    5. Placket

    Note: The names of pattern pieces are capitalized.

  • Pattern and Cutting
    For this shirt I made pattern pieces using a boy's shirt I already had. (If you need help with this there's a good tutorial on MADE for making your own patterns from clothes)

    Using an existing shirt, trace the required pieces onto paper to make a pattern. They should look something like this (These are pattern pieces from a shirt I made last year that I'll just reuse):


    Trace the Collar and Collar Stand pattern pieces onto paper. Be sure to add a seam allowance. Mine here is about 1/4".


    Place your pattern pieces onto your pre-washed fabric for cutting. Note that if you are using a one-way fabric, such as this one with little animals, you'll want to place the Collar piece upside so that the animals will be right-side up when the collar is folded down for wearing.


    Cut out two of each piece in the fabric, as well as one of each piece in fusible interfacing. Note: If you like, you can wait to cut these pieces out until you reach the point of your shirt that you actually need them. The Collar Stand has a way of mischievously becoming too short, so it's nice to measure it against the actual Collar-ready neckline of the shirt.


    Cut out the rest of the pieces, including interfacing for the Placket or Front Facing.


    Unfortunately, I have to show you a mistake in my pattern:


    It should be like this:


    I like to make mine by folding over the edge of the shirt in the front instead of cutting out a separate Front Facing. However, you must be sure to cut out the top edge in a "V" or else when you fold it over the folded Placket won't line up with the Shirt Front.
    Here's what I mean. I do this every time:


    The way I fix this problem is to trim the fabric along the upper edge of the collar-less shirt until it lines up. While this won't hurt your shirt, it might make the Collar Stand too short since I've cut it out to fit the old, smaller neckline. I might have to cut another one later.

  • Assembling the Basic Shirt

    Here is a super-short, almost wordless explanation of how to assemble the basic shirt. The numbers correspond to the steps listed at the beginning of the tutorial.


  • Sewing the Collar

    Upper Collar
    Apply interfacing to Collar and Collar Stand.

    With right sides together, sew the Collar pieces together along the sides and top, leaving the bottom open.


    Clip the corners.

    Turn and press the Collar, then set it aside. We will topstitch it later.


    Collar Stand

    Mark center points of Shirt and Collar Stand pieces.


    Measure your Collar Stand pieces to the top edge of your Shirt, matching the center points, to make sure they fit. Determine the size of your seam allowance based on how much Collar Stand you have. Remember how I said the Collar Stand sometimes isn't long enough? Well here's a perfect example for you. It should be longer than the Shirt by about 1/4", instead of the other way around.


    Wah.


    But at least I have some pink peanut M&M's!


    Back to the ol' cutting board. It looks like I have just barely enough horizontal fabric to cut out two more Collar Stand pieces. Using my faulty first Collar Stand as a guide I'm going to cut out the new pieces one at a time on the fold, but with extra fabric on the fold to make the whole Collar Stand longer.


    Okay, that was slightly embarrassing, but a good example. Let's get back to work.

    Measure your Collar Stand to the shirt again. Determine your seam allowance based on how it fits. You might want to mark your stitch line on the curved ends of the Collar Stand, starting from the bottom and following the curve about 1 1/2" into the straight, upper part of the Collar Stand. Here I've used an expensive, secret, high-tech tool known as the #2 mechanical pencil.


    With right sides together, stitch along your marked stitch line on both ends. Cut notches along the curves or clip close to the stitching.


    Turn it right-side-out and press.


    Turn it back inside-out.

    Open up the Collar Stand and put the neck of the Shirt between the Collar Stand pieces, lining up the neck edge with the lower edge of the Collar Stand. Pin it in place.


    Stitch it and clip the curves.


    Fold up the Collar Stand and press.


    Attaching the Collar to the Collar Stand

    Collar - Inside

    Remember that Collar piece I told you to set aside? Pick it up again. On the inside of the Shirt with right sides together, pin one side of the Collar to one side of the Collar Stand.


    You may have to undo a tiny bit of that 1 1/2" stitching you did on the Collar Stand to get the Collar to go right up to it.


    Stitch.


    Guess what? The inside of your collar is finished! It should look like this:


    Now let's do the...
    Collar - Outside

    It should look like this:


    From the outside, take the Collar Stand and press down about 1/4".


    Carefully pin the folded Collar Stand over the back of the Collar. You will be stitching from the inside, so you may want to put your pins in from that side as well. Put pins right along the last seam you stitched.


    The pins from the outside/messy side.


    Make sure your thread matches the collar fabric. We don't want this stitching to show much.


    Now you're going to finish sewing the back of the collar together. Remember that I said this seam gets messy? That's only from the outside. From the inside it's going to be nearly invisible. To do this we're going to sew deep down into the seam, gently pulling the fabric on each side so you can get the seam open. Pay particular attention to the two ends of the collar, as these are the parts that will show.


    Here's our lovely, messy seam from the outside. But the collar will be folded down over it so it won't show! Yay!


    Topstitching
    Stitch about 1/4" or so from outside edge of Collar, and very close to the edge all around the Collar Stand. To me this really helps finish the collar.


    Buttonhole
    One of your buttons will go on the Collar Stand. On boys' and men's shirts the left side crosses over the right, which means your buttonholes should also be on the left. Using a ruler, mark where your buttons and buttonholes will go. The collar buttonhole will be horizontal, whereas the rest going down the shirt will be vertical.


    Test out a buttonhole on scrap fabric first to make sure it's the right length for your button. It was.


    However, in practicing I realized that not only was my bobbin about to run out, but that I needed a sharper needle. Lucky for me I had these sharps on hand that--among other things--are good for buttonholes. Switcharoo time!


    Now you're ready to stitch your buttonhole. You might as well do the rest of them, too.


    Buttons
    If you haven't already done so, mark where you want your button(s).

    Now stitch! I have a handy dandy button stitch on my machine, but you could also do this by hand.


    You might as well sew the rest of the buttons on now, too.


    An alternative to buttons is no-sew snaps, which I used in the patriotic shirts and the yellow romper. They come in small packs with a handy little application tool. You just hammer the snaps into the fabric. It's actually really satisfying to do.

    Your collar is done now. Doesn't it look great?


  • Finishing

    To finish up your shirt you'll probably want to do the topstitching around the rest of the shirt and then hem it.


    Now go put the shirt on your boy, grab your camera, and let's see what you've done!

  • Related Posts Plugin for WordPress, Blogger...