Monday, October 11, 2010

Pilot Caps, Goggles & Jackets

*UPDATE*
I have now posted the pattern. Scroll down to the end of this post!


Have a young pilot-in-training in your house? I have two! For homeschool this year my sisters and I wrote a theme called "Soaring Over America." Naturally we needed pilot caps and bomber jackets for the kids to wear.


As you can see, these little aviators are equipped and ready for take off!


These inexpensive flight jackets are made from Walmart hoodies. I wanted them to have a collar instead of a hood, so I modified them a little. I like how the soft, wool-looking lining shows a little more with the collar turned down.


The pilot caps are made from thin vinyl, though they could easily be made from felt as well (I'm thinking kids' party favors for an "Up" themed birthday...)


I lined the caps for extra comfort and so I could use some cute fabric lining. Don't you love the stars?


I made the goggles out of felt with an elastic backing.


I was thinking these also make great superhero masks by themselves, but in the end I stitched the goggles to the caps so they wouldn't get lost. It also helps my two-year-old put them on easier.


(back)

Intrigued? Let me give you a hint. I made the goggles in two layers of felt to help them keep their shape better. I cut out one layer with the felt folded in half so they would be symmetrical, then sewed it onto a rectangle of felt for the second later. Not until I was finished with the sewing (well, minus the openings I left for the elastic) did I cut out the second layer. I've done this with some other projects, too. It's helps out a lot.


By the way, if you're interested in a pattern for the the caps I can post it for you. It took me some tweaking to get it the way I wanted it. I don't mind sharing. Especially with Halloween coming! *UPDATE! Pattern posted below*

I made simple initial patches for one sleeve and sewed wings patches onto the other sleeve. The idea is that the kids will earn more patches throughout the year. I even have a genuine air force wings pin for them to earn. I'm excited for that one.


Don't these look fun all ready and waiting for the boys to find them in the morning? The different colored felt and lining helps the boys easily tell which cap belongs to which kid. No fighting over them!


You can bet these will be doubling as Halloween costumes! I even made an extra cap for myself. Hmmmm... Amelia Earhart or Anne Marrow Lindbergh?


PILOT CAP PATTERN
The pictures below are set up so you can easily print each on 8 1/2 x 11" paper. Cut out each picture, overlap them, then tape them together for the pattern. My kids have small heads (as do I), so you'll want to add some seam allowance. I suggest first sewing up a test cap in scrap fabric and adjusting it until you have the right fit. Use felt for a simple, quick cap, or use vinyl and a cotton lining for a fancier one. Feel free to comment or email me with questions. Maybe in the future I'll make it into a full tutorial.


Wednesday, October 6, 2010

Sweater Vest Makeover and Tutorial


Did Brittany take up knitting? No, it's a refashion!


The boys had fun jumping and posing for the pictures. Here's what my oldest son Alexander has to say about it: "Cool, cool vests! Lincoln is watching me jump, and I'm jumping, and I like it. Lincoln is jumping cool, too."


I've had some sweater vests of mine collecting dust in my closet for quite some time. Earlier this year during Celebrate the Boy I saw that Dana made a boy's vest from a man's sweater:


Cute, isn't it? It got me thinking. So a few days ago I made my two matching sweater vests that I never wear into something my boys can wear:


That's me at Lake Tahoe a long time ago.

Since I was just changing the size of the vests instead of converting a sweater into a vest I couldn't follow the MADE tutorial exactly. Dana kept the hem of her sweater intact, whereas for me it seemed better to keep the V-neck collar, especially since I was planning on reusing all the rib-knit edges. So I started by lining up the collar of the project with one I have in the right size. (Notice the wrinkled vest? It's been folded up much too long!)


Next I started hacking away at that thing until it was the right size:


I was careful to save the rib knit sections to refinish my new little vest:


While I did keep the front V-neck intact, I had to reposition the back neck collar. I started with this, cutting off the extra rib knit. (Also, I noticed there was a stain on the outside of the back collar so I cheated and flipped it around. You can't even tell it's backwards!) One thing that helped to keep the fabric from stretching out of shape while I sewed was to stay-stitch the vest piece first. I did this around the collar, armholes, hem...and I probably should have done it on the side seams, too.


I finished off the raw edges with a zig-zag stitch (you could serge, or use whichever finishing stitch you prefer). To help the seam lie flat I topstitched the seam allowance away from the collar:


Next came the shoulder seams. Again, I topstitched the seam allowance, this time towards the back of the vest:


After the shoulder seams were complete I sewed up the side seams. I finished the edges, but didn't topstitch them down. My hem and armhole rib knit loops were too big for this little vest, so I measured and cut each of them, then sewed them back into loops:


Next I sewed the rib knit armhole loops into the armholes, again finishing the raw edges and topstitching the seam allowances towards the garment. Then I did the same for the hem:


Ta-da! Ready for my little man.


The navy blue vest also needed resizing. I love making my boys match.

Wednesday, September 29, 2010

Third Egg in the Nest


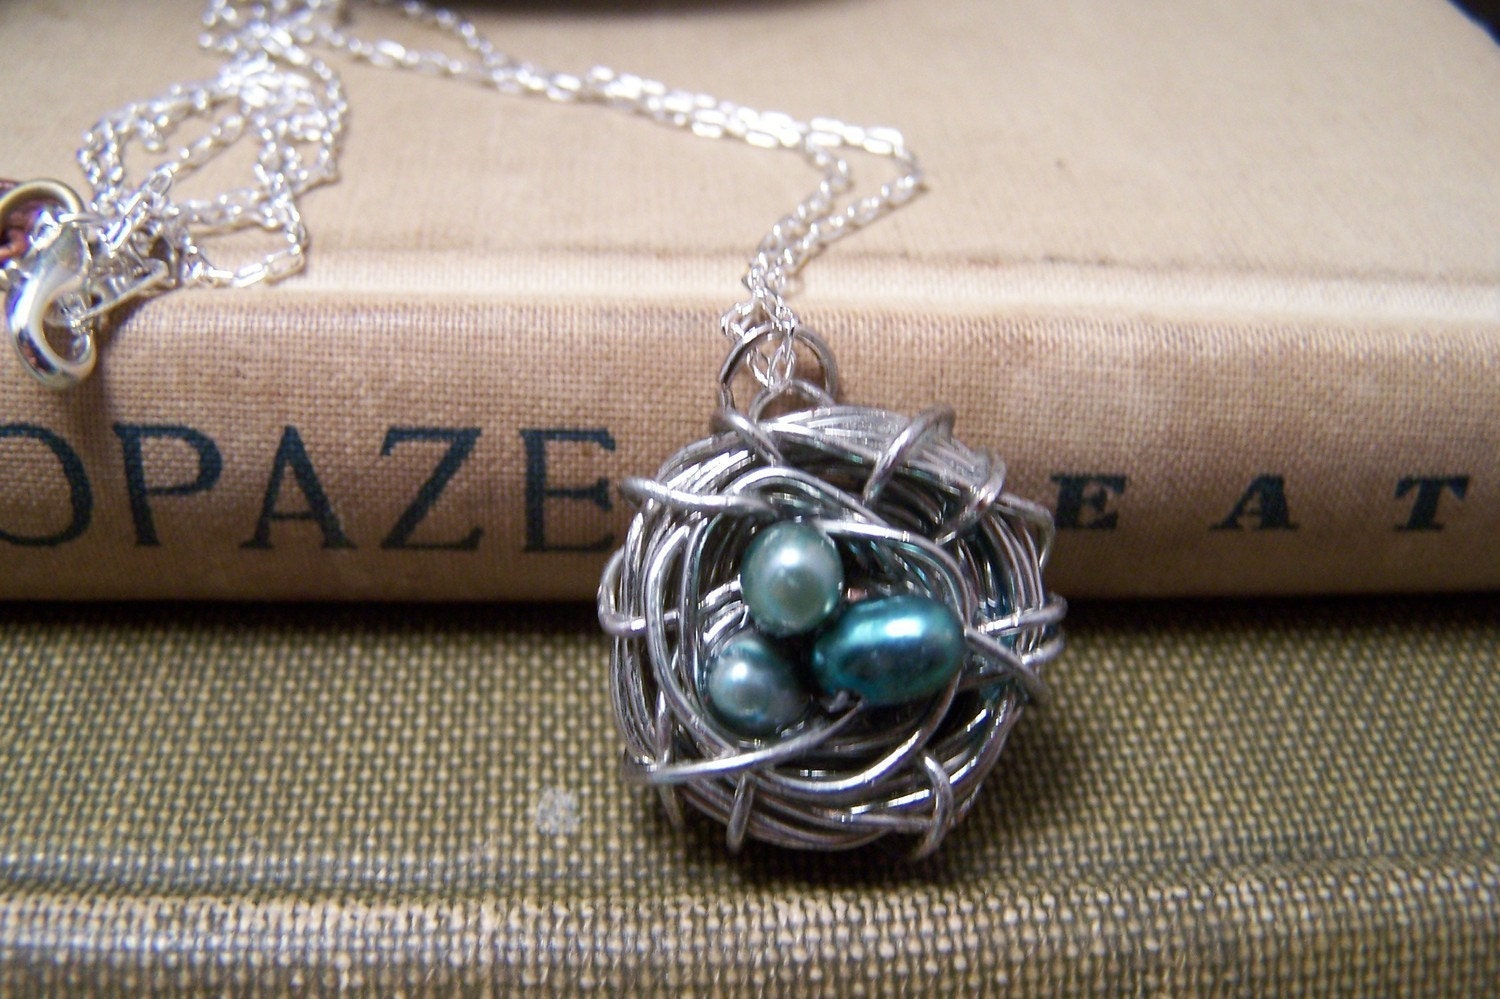
Silver bird nest pendant from Emilina Ballerina's shop on Etsy

Yes, I'm expecting! Not only that, but after birthing two boys I'm finally having a girl! I couldn't be happier about the news. My crafting has been a little (okay, a lot) sluggish the past several months. I'm going to use pregnancy as my excuse, though I can think of a few more to top it off. But now that I'm out of that awful nausea stage—though I'm still in the always tired stage—and I recently learned that Mr. Stork is bringing me a girl, I'm hoping that she will be my muse.

I think my most common comment on craft blogs is that I wish I had a girl so I could make/buy/win that skirt, dress, hairclip, or other flowered or ruffled item, too. Now I'm eligible! And oh-so-excited! I hardly know where to begin. So what are your favorite baby girl items? Where should I start?

And, because I know you'll ask, she is due February 19.

P.S. I did buy that necklace. I feel like I've earned it! And isn't it beautiful?

Thursday, September 16, 2010

Tie on that Patriotism

This is one of those projects inspired by the fabric itself. It's from Riley Blake's All Star line. When I saw the paisley I knew exactly what to do with it: Ties!


These were taken on July 4 in my mom's backyard. The flag made for some really fun pictures, although it was stressful trying not to let the boys drag it on the ground!


I love the chest puffs...


The sweetness...


...And the enthusiasm. But enough about my cute boys. Let's talk about the ties.


I had originally planned to make them like a classic tie so I wouldn't have to mess with the clip and all that. But when I cut them out, measuring from a Children's Place tie, I forgot to account for the part that goes around the neck, though at least I remembered the knot!


My local quilting shop sells clip-on tie patterns and the clips, so I made an emergency run over there to buy the clips so I could finish the ties in time for Independence Day. I didn't know how to do the knot (and still don't!), but I just played with it until I got it right, then put in a few stitches to keep it in place.


I made three of these ties. On this one I top stitched the red "lining" in place. In the other ones I sewed then turned. It's nice to try different ways.


Since I cut the ties out on the bias of a yard of fabric I had plenty of leftover material. Here's the first tie, along with matching skirts that went to my nephew and nieces for their birthdays. I had never made little girl skirts before so I had a blast with these.


Here are the girls wearing them on July 4 (taken with a cell phone in Milwaukee--so far away!).


Little Patriots

I suppose I should have posted this for Independence Day, Labor Day, or even September 11. We're closest to that last one, so let's just say this it's 5 days earlier :)

Monday, June 14, 2010

The Huge T-Shirt Refashion

A few years ago my husband and I got some X-Large family reunion tees. For this year's reunion I decided to cut mine up and sew it into something I could actually wear.

You can see the difference below. These shirts used to be the same size. Crazy, huh?


My favorite part is the short, gathered sleeves, copied from another shirt I love.


I also love the length of the shirt. It stays in place with no fuss.


I'm considering doing a pattern or tutorial for the sleeves of this shirt because they are so unique. In the meantime, there's a great t-shirt refashion tutorial over on This Mama Makes Stuff. "That" mama actually introduced me to wardrobe refashioning and I think she must be the reason it is so cool today.

After this successful project I'm so ready to hack into some older t-shirts I've had stashed and make them wearable too!

Friday, May 14, 2010

Feminine Flower Headband


There seem to be flowers popping out of little girls' hairdos everywhere these days. But there's no reason for the under-aged to have a monopoly on this trend!


One afternoon I found myself in need of something special to dress up my hair for an event I was attending that evening. I had this project in my stash so I pulled it out and whipped it together in less than five minutes. Seriously.


I love it. I can wear it on a casual date night, to book club, to church, or to a formal event. And, heck, why shouldn't I wear it to the grocery store, too?


You only need three items for this project:
1. Silk flowers
2. Headband - I got these simple, black metal headbands in a 3-pack for a couple bucks at Hobby Lobby
3. Floral tape. A ribbon would work as well.

Now place your flowers on the headband and secure the stems with the floral tape.

Move over, little girls: you WISH you were 30!

Monday, March 29, 2010

The Painted Egg

I'm alive! I can hardly believe it's been a month since I last posted. I've been on vacation! I have lots to share with you, but I wanted to start with this since Easter is this week.


These painted wooden eggs are becoming a little Easter tradition for our family. They are nice because they won't rot or break! The wooden eggs came from the craft store (Michael's, I think) and are painted with acrylic craft paint. Be sure to buy enough eggs for your kids to paint with you!


Silhouette Eggs

I love the old fashion silhouette look. I recently got my younger son's silhouette cut at Disneyland. But honestly, I always think afterwards that I could have done it just as well myself. That was what inspired these eggs.

How I made the silhouettes:
1. I freehand-outlined my kids'profiles onto the background paint with a pencil. (You could also cut out a side-view picture of your kids and trace around the edges).
2. Next I traced over the pencil lines with a black pen. I suggest using a Sharpie or something that won't bleed when you put the varnish on.
3. Then I filled in the outlines with black paint.
4. I wrote the name on the egg with a pencil, and traced over it with a fine paintbrush. This could also be done with a non-bleeding pen. Be sure to mark the year on the bottom as well!
5. The last step is to put a varnish on it. I prefer a satin finish, and I suggest taking pictures before you do it so the shine doesn't get in the way. But I only had a glossy varnish on hand and my husband had our camera for the day. That's okay, too.

Family Egg

This is one I painted in 2007 when we only had one child. As you can see, the details are not perfect, but the egg is still whimsical and special. The back says, "The Henage Family"

Spring Chick and Bunny Egg

Another old fashioned-inspired egg I made this year. The bunny is Tony, who was my pet rabbit when I was little.

Monkey One's Mouse Egg

This one has a gray mouse with black whiskers and gray rainclouds in the sky.

Monkey One's Family Egg

This one has our family in it (the little black figures) and Winnie the Pooh. The pictures would have turned out clearer if I had given him a non-bleeding pen to use instead of paint, but I like that he has exposure to using different media. I tried not to tell him how and what to paint, but let him exercise his own creativity. Sometimes that's hard for me!

Monkey Two's Egg

Even my almost-two-year-old got in on the fun. Though he was mostly painting his own hands!

I love that I can keep these eggs and decorate our house with them year after year. And now I want to see your eggs!
Related Posts Plugin for WordPress, Blogger...